
I love the idea of my girls having something special to wear for the holidays, and it’s even more fun when it’s something I can make! So as Thanksgiving is quickly approaching, I decided to create something special that they could both wear––I hardly ever put them in matching outfits, but I couldn’t resist with this cute little turkey! So today I am sharing my tutorial for this fun, festive ribbon turkey shirt.

Here’s what you need:
Ribbon- 4 different colors for feathers
Thin red ribbon for the waddle
Wooden skewer or toothpick
Needle & Thread
Felt for body
Hot Glue Gun
Craft eyes
Shirt or Onesie
First, you’ll want to cut your body out of the felt. You will need two large circles and one small circle. The size of the circle will depend on how large your shirt is and how big you want the turkey. I cut the circles a little smaller for my younger daughter’s onesie.
Next, cut your ribbon. You will need seven pieces for the tail feathers. I chose to do one of the gold (since it was pay per yard) and two of each orange, purple and red. My pieces were about 8 inches long. The length will depend on how long you want your feathers.

You’ll want to get your waddle curling at this time. Heat your oven to the lowest temp–mine was 170. Take your skewer and place a dot of glue on it, stick one end of the thin red ribbon, and simply wrap the ribbon tightly around using another dot of glue to secure it. Take the skewer and run it quickly under water. You don’t need to soak it, the ribbon just needs to be wet. Stick it on a cookie sheet and in the oven until it dries out, maybe 15 minutes or so.

When it’s dry, remove it from the stick and cut off the glued ends. You should have something like this.
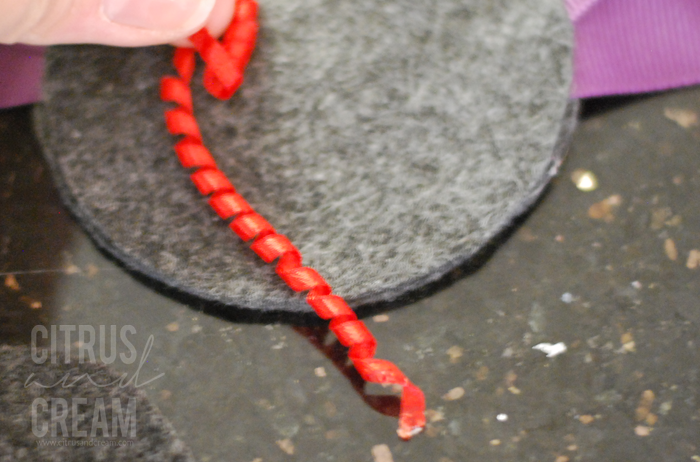
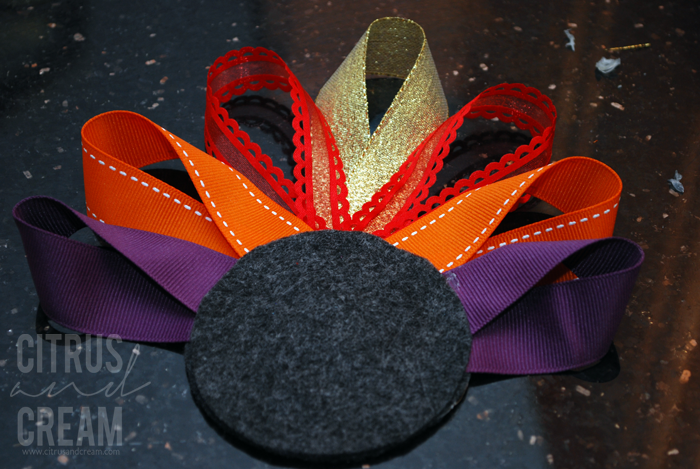
Now we can make the body. Take one of your larger circles of felt and start folding your ribbon over and gluing it down. You will want the different colors to overlap.

Continue doing this until all of your feathers are in place.

Now glue your second piece of felt on top.
Cut a small triangle from one of your colors, quickly singe the edges to keep from fraying. Place a dot of glue on your small felt circle, glue a small piece of your waddle in place and put the beak on top.
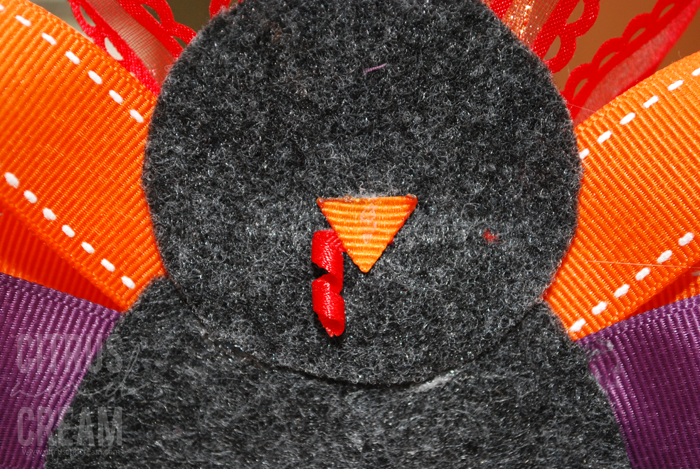 Glue your smaller felt circle (the head) onto the larger circles, overlapping just a bit. Glue two eyes in place.
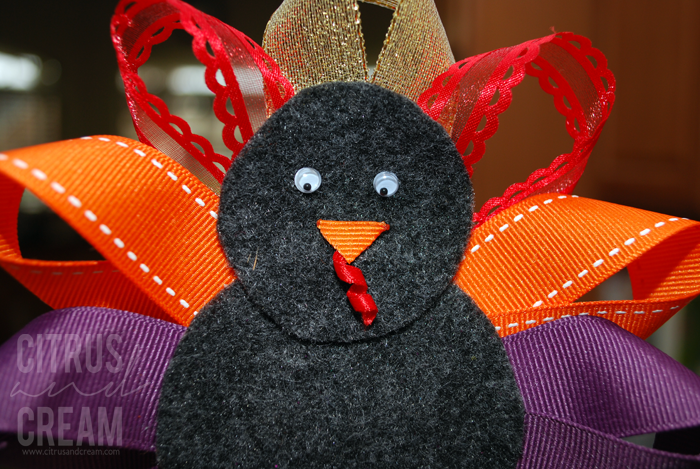
Now your turkey is complete, next we’ll stitch it to the shirt. I put a little glue in the middle of both circles and placed it on the shirt, just enough to hold it in place (don’t get the glue on the outside edge of the circles or it will be really hard to stitch through).
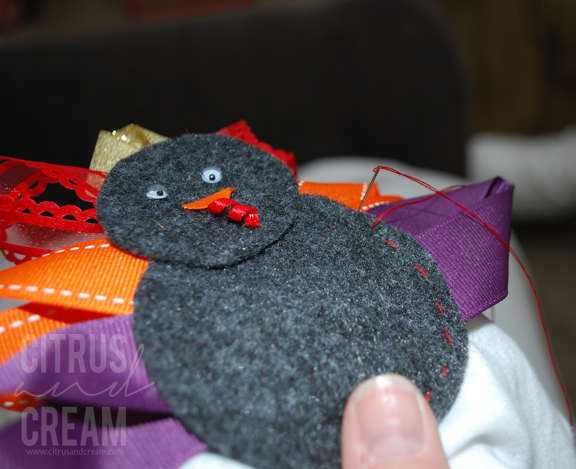
Stitch around the outside of your turkey using a simple running stitch. Tie it off when complete, and you’re done!

I’d love to see it if you decide to make one, they are SO much fun and you can get really creative with the different ribbons!
This is really cute! What do your girls think of it?
Thanks, Chelsea! My oldest loves it- I actually made one extra turkey just so she could have it to play with 🙂
I love these! Very clever! Good job!
Thanks, Debbie! So much fun to make too!